
Wow … I hadn’t realized that 3/4ths of our Heroes could attack more than one enemy in one action! But, going through the stack of Action Cards, there they were … the Dirty Dozen!
- Adryel
- Antathys
- Bassilus
- Eradicator
- Gia
- Melithys
- Memnon
- Qorox
- Sigyn
- Talya
- Tarira
- Xalia
Melithys
Melithys sounds kind of reckless. She has TWO Action Cards that damage multiple characters each. And, yes, I said “characters”, not “enemies”. Her damage goes to everyone near her, including other Heroes (so take care to look around to see where the damage will go).
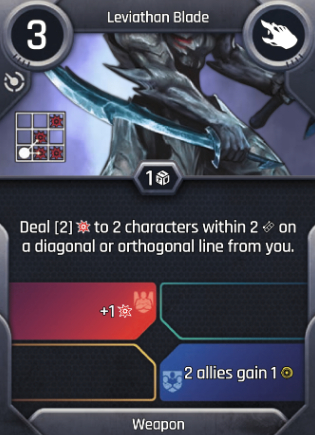
Leviathan Blade damages TWO characters (enemy and Hero alike) that are within a range of 2 in a diagonal or orthagonal line from you. The 2 damage can be increased by the die roll or by a red boost.
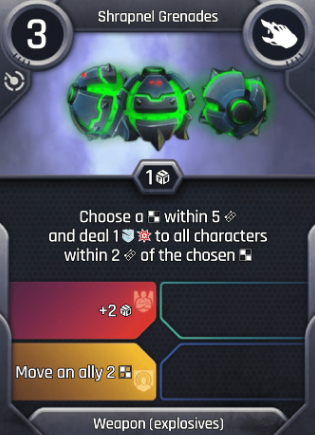
Shrapnel Grenades damage all characters in a 3×3 grid around the square where the grenade explodes. The 1 damage is unblockable (and can’t be increased by dice or boosts).
Bassilus
Bassilus also carries grenades around with him.
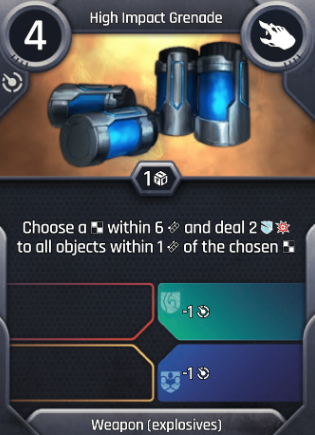
High Impact Grenade – Choose a square within a range of 6 that designates where Bassilus will toss the grenade. When it explodes it does 2 unblockable damage to all objects (which could include a fuel barrel) in a 3×3 grid around the square where it explodes.
Talya
Rather than grenades, Talya deploys a mines.
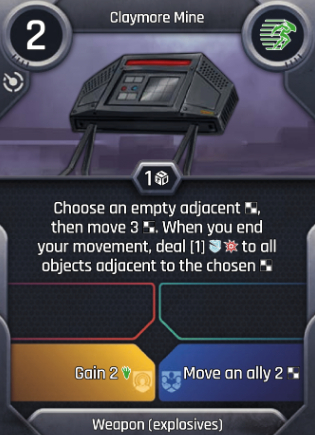
Talya sets a Claymore Mine down on an empty square that is adjacent to her. Then she quickly moves away 3 squares. When she gets to that 3rd square the mine explodes doing 1 unblockable damage to all objects (which would include fuel barrels) within a 3×3 grid with the mine explosion in the center. The die roll can increase that unblockable damage to 2 or 3. And she can use a yellow boost if she needs to skedaddle a bit further than the default 3 squares!
Antathys
Antathys steps up his threat to adjacent enemies to be on every turn!
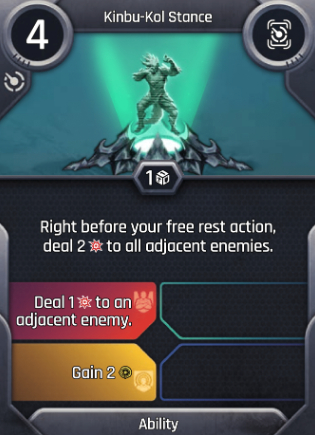
The Kinbu-Kal Stance is an EFFECT. As long as the card is on your cooldown track it will deal 2 damage to all adjacent enemies right after you finish your 2nd action. The red boost is not connected with the EFFECT, but does allow you to do that little extra damage of 1 before the EFFECT is started (in that case you would deal 1 damage to 1 adjacent enemy when you played the card with red boost … then after both actions on that turn the EFFECT begins and does damage to every adjacent enemy, including the one your red boost damaged.
Gia
Depending on how well you roll your THREE dice, Gia can do quite a bit of damage (a little at a time).
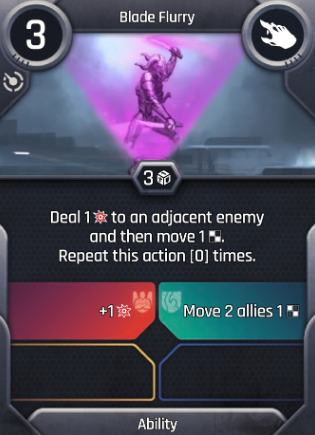
The 1 damage for Blade Flurry happens every time you move 1 square! If you move back and forth between the same two squares you can damage the same enemy each time. Or you can go on a long run damaging different enemies as you go. Plus, if you use a red boost, the damage EVERY TIME will be 2 instead of 1. Take care how you interpret your dice rolls. The green feet icons allow you to move (which then allows you to inflict damage for every square you move … so rolling a two green feet icon lets you do damage twice as you move two squares). After you do all your moves, then check for any +1 or +2 on your dice. Each lets you repeat the action again with moves provided by the move icons on the dice.
Example … using a red boost and rolling the three dice:

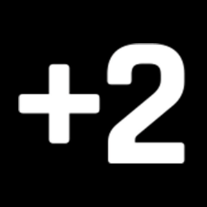
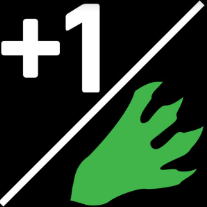
If this is the result of rolling three dice, you can choose to use that third die as a +1 or as a move. Let’s choose to use it as +1. So you have two movement and a +3 (+2 plus +1). You slowly move two squares doing 2 damage to an adjacent enemy at each square (because your red boost gives you that extra damage in addition to the default 1 damage). After moving the two squares you have done 4 damage (2 damage with each square you moved). Now you get to do this all over again THREE TIMES (for the +3 from your dice roll). That means in this example we will move two squares slowly doing a total of 4 damage three more times (or 12 more damage). So the total damage inflicted on adjacent enemies as we “walked” around was 16 (the initial 4 plus the additional 12).
Qorox
I remember playing as Qorox and using his Shield Emitter many times (was great fun).
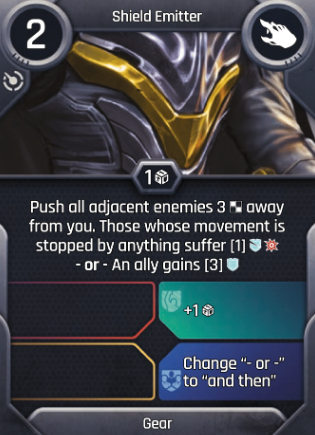
Quite often Qorox might get “surrounded” by the enemy. If you manage to position yourself nicely, the Shield Emitter will push each of them away INTO a wall (or another character, yes, bumping into another enemy or hero or object works too). If this stops their movement before they move 3 squares, damage is inflicted on them! The damage is unblockable! It starts at just 1 unblockable damage by default, but a good die roll can do 2 or 3 unblockable damage. And if you need more damage, use a green boost to roll a second die to hopefully get another +1 or +2 for even more unblockable damage! And this is to every enemy that is adjacent to Qorox.
Tarira
Damage all adjacent enemies (or one extra damage if there is only one)
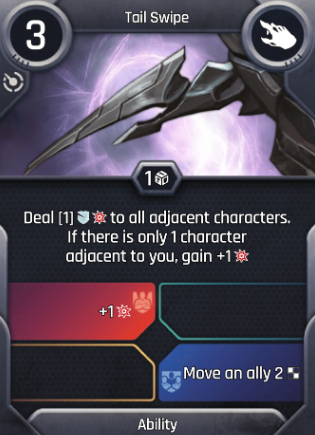
Tail Swipe does unblockable damage that starts at 1, but a good die roll can get it up to 2 or 3. Plus use a red boost to add one more unblockable damage! This damage is to every adjacent character (yes, even an adjacent Hero, so be careful where you swipe your tail). If there is only one character adjacent to you, then do one extra damage to it!
Xalia
Xalia can damage two enemies in one action
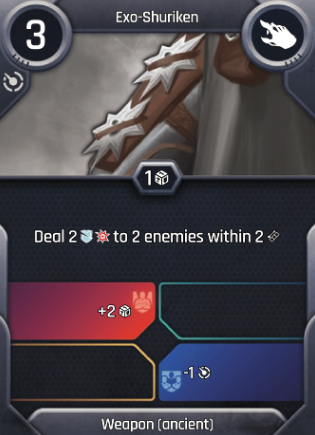
Exo-Shuriken does 2 unblockable damage to 2 different enemies within a range of 2. The die roll does not increase the damage, the range or the number of enemies. But if you roll a movement icon you can move to get within range of your target enemies. A red boost will let you roll three dice instead of just one, increasing the possibility of a good movement before (or even after) doing the damage.
Sigyn
Sigyn can damage 2 or more adjacent enemies in one action
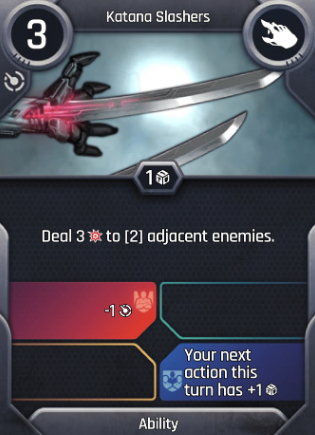
Katana Slashers does 3 damage to 2 adjacent enemies (or more with a good die roll).
Memnon
Memnon can damage two enemies within a range of 3
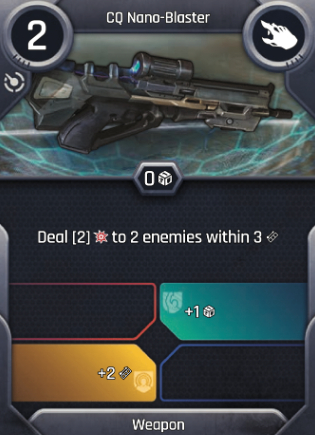
By default the CQ Nano-Blaster does 2 damage to 2 enemies within a range of 3. You can use a yellow boost to extend the range to 5. A green boost will let you roll a die to increase the damage (with a +1 or +2 result). You cannot use both a yellow and a green boost in the same action.
Adryel
In order to damage a second enemy in one action, he must eliminate the first one!
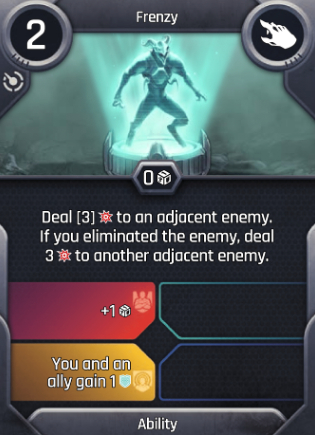
Frenzy will inflict 3 damage an adjacent enemy. If you need more damage, use a red boost to gain a die to roll (trying to get a +1 or +2). If you eliminate that first enemy, Frenzy will inflict 3 damage another adjacent enemy (the red boost does not increase this second attack).
Eradicator
Eradicator rounds out this list of our Dirty Dozen, and actually does damage to himself during his attack!
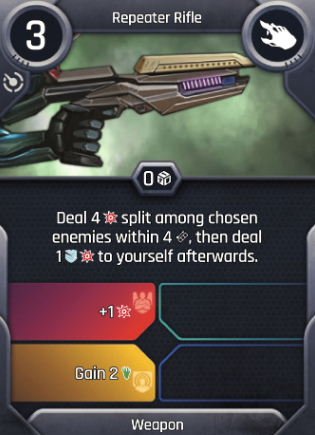
His Repeater Rifle can damage up to 4 enemies (or even 5 using a red boost). However, the more enemies within a range of 4 that Eradicator targets, the less the damage being inflicted because he has to divvy up the 4 damage between each target (a red boost gives him 5 damage to distribute amongst the targets). He does this damage to the enemies first, and then does 1 unblockable damage to himself (if this causes him to go unconscious, he does do the damage to the enemies first).
Look over the full set of Hero Groupings:
- ZERO => Absolute Zero (Placing Others Before Self)
- ONE => Invisible One (Cloaking)
- TWO => Move Through You Two (can’t block or stop them)
- THREE => Jumping Three (Jumping Jehoshaphat)
- FIVE => Favored Five (Healing Heroes)
- SIX => Long-Range Rest Repeat (Two Turns In A Row)
- SIX => Super Six (Longest Range Weapons)
- SEVEN => Secret Seven (best Hacking Heroes)
- EIGHT => Excellent Eight (Speed Runners)
- TEN => Terrible Ten (Unblockable Attack)
- TWELVE => Dirty Dozen (Damage Multiple Enemies in One Action)
See some First Looks and Updated Info using this master list (close to two dozen already):
=> Take A Look


Leave a Reply